Coilovers vs. Traditional Suspension Systems: Key Differences Explained
Coilovers vs. Traditional Suspension Systems: Key Differences Explained
Blog Article
Installing Coilovers on your vehicle may dramatically enhance the journey quality, handling, and efficiency of your vehicle. If you're looking to boost your operating experience, this information may walk you through the steps to install coilovers effectively while ensuring safety and functionality.
What Are Coilovers?
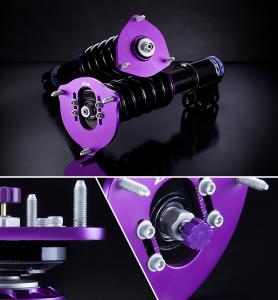
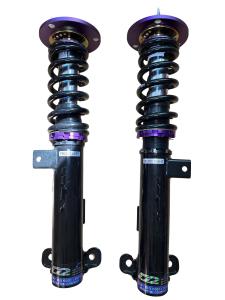
Coilovers are a mix of a coil spring and distress absorber, stored together as one component. They let car lovers to adjust the drive level, stiffness, and damping of these vehicle, creating them a well known adjustment for equally street and track use. Before starting the installment, ensure you have selected the correct coilovers designed to your vehicle make and model.
Instruments You'll Require
Prior to starting, gather the necessary tools to help make the process successful and safe:
Port and jack stands
Torque wrench
Plug set
Spring compressors (if needed)
WD-40 or even a rust penetrant
Plastic mallets and screwdrivers
Double-check your vehicle's specifications and confirm that you have everything needed to perform the job.
Step-by-Step Information to Installing Coilovers
1. Make Your Car
Start with parking your car or truck on an appartment, stable surface. Interact the parking brake and guarantee the port stands are solidly in position to stop accidents during installation. Carry the automobile employing a hydraulic port and take away the wheels at all four corners.
2. Take away the Previous Suspension
Utilizing your outlet set, discover the screws holding your overall bangs, struts, and springs in place. Use decay penetrant if products appear hard to loosen. After the products are removed, you need to be able to remove the suspension parts carefully. Keep areas arranged in the event you require to look right back for reference.
3. Mount the Coilovers
Arrange the mounting factors of the coilovers with the supports on your own car. Protected them set up using the bolts provided by the manufacturer. Be sure to follow the torque requirements that come with the instructions; over-tightening or leaving bolts loose could compromise safety.
4. Adjust Height and Preload
Many coilovers present change rings to create ride height and preload. Using the offered methods, manage the controls to your preferred measurement, ensuring enough approval for driveability without sacrificing performance.
5. Check always All Products and Associations
Before finishing up, go over every bolt and relationship to ensure they are secure. A free secure all through function could lead to significant issues on the road.
6. Reinstall Wheels and Test Travel
After the coilovers are fitted, place the wheels right back on and decrease the car. Get the automobile for a quick test get to familiarize yourself with the brand new setup. Hear for any strange sounds and recheck bolts following the drive.
Fine-Tuning for Optimum Efficiency
The beauty of coilovers is their adjustability. Following installment, spend time fine-tuning the rigidity, damping, and experience level to suit your preferences, whether you prioritize track-level efficiency or a relaxed daily drive.
Adding coilovers on your car or truck is just a gratifying challenge that raises equally look and performance. With this particular guide, you are able to confidently tackle the method and enjoy remarkable managing on every drive. Remember, protection generally comes first, so spend some time, double-check every stage, and do not wait to consult a specialist if needed. Happy driving!
Report this page